2023年10月17日 星期二

Linux主機閒置自動登出

Linux主機閒置自動登出 

設定Linux 主機在一定時間未操作時,自動登出系統。Redhat官網How to keep TCP sessions alive for extended periods of time? ,可以shellsshftp等項目設定自動斷線。

Bash Shell timeout基本設定

檢查是否有設定timeout時間
# export | grep TMOUT

一次性設定 ( 10分鐘自動登出 )
# export TMOUT=600

固定性更改  ( 10分鐘自動登出 )
對於特定使用者,在 $HOME/.bashrc 進行設定。
# echo "TMOUT=600" >> ~/.bashrc

對於所有用戶,在 /etc/bashrc 設定。
# echo "TMOUT=600" >> /etc/bashrc

增加檔案
# vi /etc/profile.d/auto-logout.sh
---
#!/bin/bash
#Auto-logout in 600 seconds if the session is idle
export TMOUT=600
readonly TMOUT
---

# chmod +x /etc/profile.d/auto-logout.sh
# source /etc/profil
readonly 設定變數和函數為只有讀取權限。
使用者將無法變更名為 TMOUT 的變數的值。

Openssh 伺服器設定自動登出

Openssh 伺服器自動登出參考官網Which options can be used to configure ssh's timeout?

新增 ClientAliveInterval和ClientAliveCountMax到/etc/ssh/sshd_config檔案
ClientAliveCountMax:使用者活動訊息的統計次數。
ClientAliveInterval:等待使用者輸入的逾時時間。

伺服器每25秒發送訊息給用戶端,當沒有收到任何回應,累計2次後終止連線。所以是50秒沒有任何輸入自動斷線。
---
        ClientAliveInterval 25
        ClientAliveCountMax 2
---

使用者2分鐘無使用動作,自動中斷使用者連線。
---
        ClientAliveInterval 2m
        ClientAliveCountMax 0
---
正常設定 ClientAliveCountMax 0 是禁止伺服器發送活動訊息及使設定用者輸入的逾時時間 ClientAliveInterval 是可以實現。
但RHEL 8.6 和 RHEL9 中的設定ClientAliveCountMax 0會導致不同的行為,參考官網SSH server no longer terminate inactive sessions when setting ClientAliveCountMax=0,所以建議設定ClientAliveCountMax=1。


參考資料: 
How to keep TCP sessions alive for extended periods of time?
https://access.redhat.com/solutions/23874
Which options can be used to configure ssh's timeout?
https://access.redhat.com/solutions/25773
SSH server no longer terminate inactive sessions when setting ClientAliveCountMax=0
https://access.redhat.com/solutions/6962538
Linux / UNIX Automatically Logout BASH / TCSH / SSH Users After a Period of Inactivity
https://www.cyberciti.biz/faq/linux-unix-login-bash-shell-force-time-outs/

2023年10月15日 星期日

Zabbix系統效能調整

Zabbix系統效能調整

當Zabbix運作一段時間,不斷加入主機及監控項目,可能會有產生以下狀況時。
  • item資料太多,有些item沒有數據或Zabbix繪圖中常出現斷圖。
  • 前端WEB頁面無回應,或回應速度慢。
  • 在Administration > Queue中,有太多被延遲的item。

可以先觀察Zabbix 內建的監控項目-Zabbix server:Data gatherig processes。
process

及在 Reports > System information 的Required server performance, new values per second ,了解NVPS (每秒處理數值數),來評估Zabbix 運作狀態,進行相關設定調整。
nvps


Zabbix設定

參考官網Performance tuning ,以Zabbix系統參數調整為主。
在Zabbix 使用正常HistoryPollers、Pollers、unreachable poller數量,依監控方式調整其它Poller輪詢器的種類數量,僅設定監控所需參數,避免系統過載。
如果設備數量較多,可以使用Proxy分散架構,將所有輪詢委託給Proxy主機執行。

在Template中,調整所有item(項目)的Update interva(更新間隔)。
保持較小的更新間隔可能對圖表呈現有好處,但是可能會使 Zabbix 過載。

在Template中,調整預設的參數,包含item的啟用或停用,降低item數量,減低系統負載。

不要監視返回相同訊息的參數。

避免使用作為函數參數給出的較長週期的觸發器。例如,max(/host/key,1h) 的計算速度將明顯慢於 max(/host/key,1m)。

Zabbix Server設定

zabbix_server.conf 設定調整,相關數字依狀況調整。
---
StartPollers=80
主動收集資料輪詢器執行數量

StartPrepprocessors=20
預處理工作執行數量

StartPingers=10
ICMP pinger 執行數量

StartTrappers=20
Trappers 接受 Zabbix sender、Agent和Proxy 的傳入數量

StartDBSyncers=6
history syncers的執行數量,也是DB同步數量。

StartEscalators=10
告警升級執行數量

StartAlerters=10
告警執行數量
 
CacheSize=128M
用於儲存主機、item和trigger資料的共享記憶體大小

Timeout=3
等待Agent、SNMP 或外部檢查的時間(以秒為單位)
----

Zabbix agent 設定

Agent監控應合理使用主動或被動模式設定,建議使用主動模式,提高server效能。

Zabbix_agent2.conf 設定檔調整
--
Timeout=15
輪詢器將等待處理時間(秒),預設為三秒。

StartAgents=3
Agent同時處理的進程數量,被動模式。

RefreshActiveChecks=60
刷新活動檢查清單的頻率(秒)。刷新活動檢查失敗後,將在60秒進行下一次刷新。
---

Zabbix Proxy設定

使用Proxy 分散式架構,合理使用主動或被動模式,設定正確的Pollers 輪詢器,減少了server負載。

zabbix_prxoy.conf 設定檔調整
---
ConfigFrequency=3600
調整Proxy 與 Server配置更新時間(以秒為單位)。Active mode參數。

StartDBSyncers=4
history syncers的執行數量

ProxyLocalBuffer=0
Proxy 將在本地保留資料 N 小時,即使資料已經與伺服器同步。

ProxyOfflineBuffer=1
如果與 Zabbix Server 沒有連接,Proxy 將保留資料 N 小時。
---

DB調整參數

MariaDB調整InnoDB參數

---
innodb_file_per_table = 1
innodb_buffer_pool_size=主機RAM的50%~75% 
innodb_buffer_pool_instances = 4
innodb_flush_log_at_trx_commit = 2
innodb_flush_method = O_DIRECT
innodb_log_file_size = 256M
---

其它調整

在Zabbix 調整housekeeping管理參數或關閉housekeeper,調整DB的history分區。
在OS中使用ps和top查看Zabbix進程效能。


要讓Zabbix 穩定運作發揮作用,明確建立Zabbix監控項目,減少不必要的資料收集非常重要。將有助於提高監控效率,避免被監控系統過載,並使管理和分析收集到的資料變得更容易。

參考資料:


2023年10月14日 星期六

Zabbix High availability 設定

Zabbix High availability 設定

High availability (HA) 高可用性是應用在IT環境的重要項目,當服務出現故障時進行移轉,由其它設備接手服務,減少服務故障的影嚮。
Zabbix 6.0 LTS 提供簡單設定的高可用性(HA)解決方案,提供Zabbix Server 軟體/硬體故障的額外保護,或減少因維護而導致的停機時間。
在Zabbix 高可用性模式中,多個 Zabbix Server會作為cluster 叢集中的節點。
當cluster 叢集中的有Zabbix Server 處於active時,其他 Server 處於 standby,當有狀況時接手服務。
Zabbix 高可用性只有針對Zabbix 相關服務,並不包含DB。DB 高可用性需要搭配其它方案。

設備環境

Zabbix Server 主機
OS:Ubuntu Linux LTS 22.04,Hostname:u22-z6,IP:192.168.203.193,
安裝 Zabbix Server 6.0 LTS,MariaDB 10.6.12
OS:Debian Linux LTS 11,Hostname:dnode01,IP:192.168.203.171,
安裝 Zabbix Server 6.0 LTS

將新增第2台Zabbix Server主機dnode01,在原有u22-z6主機的DB服務開啟dnode01連線權限,來測試Zabbix  High availability功能。
Zabbix Server服務安裝請參考,只需要安裝Zabbix 相關套件,不需要安裝DB。
DB設定指向u22-z6的IP:192.168.203.193

高可用性實現

設定Zabbix Server 作為叢集節點

在Zabbix Server設定檔設定兩個參數將 Zabbix Server作為叢集節點。
HANodeName=節點名稱
NodeAddress=節點IP:Port
如果不指定HANodeName,則Zabbix Server將以獨立模式啟動。
Zabbix 前端網頁將使用 NodeAddress 參數連接到活動伺服器節點。

# sudo nano /etc/zabbix/zabbix_server.conf
---
HANodeName=節點名稱
NodeAddress=節點IP:Port
---
01-u22-z6 config
02-dnode01 config
更新所有Zabbix Server,並重新啟動。
另外確認Zabbix 前端網頁沒有定義ZBX_SERVER和ZBX_SERVER_PORT。
檔案位置/etc/zabbix/web/zabbix.conf.php
grep zabbix.conf

Zabbix Agent設定

Zabbix agent 2 在HA 叢集環境要依被動或主動模式設定。
被動passive agent,所有節點名稱或IP必須寫在Server參數中,並以逗號分隔。
Server=u22-z6,dnode01,192.168.203.192,192.168.203.171
主動active agent,所有節點名稱或IP必須寫在ServerActive,並以分號分隔。
ServerActive=u22-z6:dnode01:192.168.203.192:192.168.203.171
請注意,對於主動檢查,節點與任何其他伺服器必須以逗號分隔,而節點本身必須以分號分隔。

Zabbix Proxy設定

Zabbix Proxy在HA 叢集環境要依被動或主動模式設定。
被動代理passive proxy,所有節點名稱或IP必須寫在Server參數中,並以逗號分隔。
Server=u22-z6,dnode01,192.168.203.192,192.168.203.171
主動代理active proxy,所有節點名稱或IP必須寫在Server參數中,並以分號分隔。
Server=u22-z6:dnode01:192.168.203.192:192.168.203.171

運作檢查

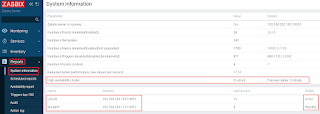
在Reports > System infornation 中
05-cluster status
可以看到High availability cluster、Fail-over delay: 1 minute及節點主機運作狀態。

在Active 節點上使用zabbix_server -R ha_status 確認。
03-u22-z6 status

在Standby節點檢查zabbix_server.log
04-dnode01 status

停用Active Server-u22-z6
u22-stop

服務會自動移動到-dnode01
dnode start

根據官網說明故障轉移到備用節點只要5秒
因為所有節點每 5 秒更新一次檢查狀態。
如果Active節點關閉並報告其狀態為"已停止",則另一個節點將在5 秒內接管。
如果Active節點關閉/變得不可用而無法更新其狀態,備用節點將等待Fail-over delay+ 5 秒來接管
Fail-over delay是可設定的,支援的範圍為 10 秒到 15 分鐘(預設為一分鐘)。
若要變更故障轉移延遲,可以在Active Server執行:
zabbix_server -R ha_set_failover_delay=5

經過測試了解Zabbix High availability 是方便可行的,後續將研究DB建置ha架構,將功能更完善。


2023年10月13日 星期五

Zabbix 使用scheduled reports 功能

Zabbix  使用 scheduled reports

Zabbix 6.0 LTS提供scheduled reports 功能,
安裝 Zabbix Web service 並設定 Zabbix Server 定期產生報告。
官網Scheduled reports
https://www.zabbix.com/documentation/6.0/en/manual/config/reports

但目前scheduled reports 的支援處於實驗階段。
scheduled reports 是利用Zabbix Web service 和 Google Chrome 瀏覽器來產生定期報告pdf。
所以需要安裝 Zabbix Web service和 Google Chrome 瀏覽器。Zabbix Web service可以和Zabbix Server 安裝在同一台機器上,也可以安裝在不同的機器上。Google Chrome 瀏覽器一定要和 Zabbix Web service 安裝在相同的電腦。

設備環境

Zabbix Server 主機

OS:Ubuntu Linux LTS 22.04,Hostname:u22-z6,IP:192.168.203.193,
安裝 Zabbix Server 6.0 LTS、Zabbix Web service、google chrome

安裝設定

google chrome安裝

在Zabbix Server直接下載google-chrome-stable套件進行安裝
# wget https://dl.google.com/linux/direct/google-chrome-stable_current_amd64.deb
# sudo apt install ./google-chrome-stable_current_amd64.deb
01-install chrome

Zabbix Web service安裝

在Zabbix Server直接安裝Zabbix web service,並設定開機啟動。
# sudo apt install zabbix-web-service
# sudo systemctl restart zabbix-web-service
# sudo systemctl enable zabbix-web-service
02-zabbix web install

Zabbix Server設定

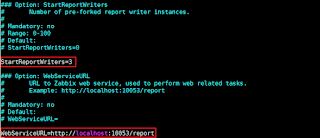
修改zabbix_server.conf,增加StartReportWriters,WebServiceURL參數,並重新啟動。
# sudo nano /etc/zabbix/zabbix_server.conf
---
StartReportWriters=3
WebServiceURL=http://localhost:10053/report
---
# sudo systemctl restart zabbix-server
03-edit zabbix server

Zabbix web 設定

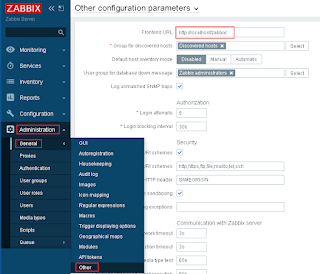
設定Frontend URL

在Administration > Other,設定Frontend URL:http://localhost/zabbix/
04-fronted url setup

Scheduled reports 設定

在Reports > Scheduled reports,右上方Create repor新增
05-create scheduled repots

設定Name:repo-Zabbix server (可自行輸入)
06-setup scheduled reports
Owner點選Select,選擇使用者
07-select owner
Dashboard點選Select,選擇要產生報告的Dashboard
08-select dashboard
Period:Previouv day
Cycle:Daily
Subject:repo-Zabbix server (可自行輸入)
Message:repo-Zabbix server (可自行輸入)
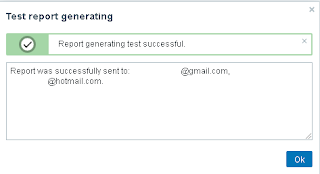
選取Test進行測試,請收件者要先設定可以接收email通知才會成功。
09-test
測試成功就可以Add新增。

Report結果

mail

10-test ok

附件pdf

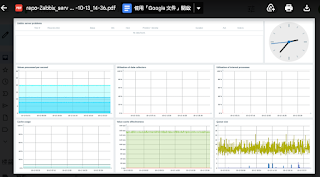
11-test pdf
對於多頁儀表板,PDF 報告中僅包含第一頁。


2023年10月12日 星期四

Zabbix新增Web monitoring 監控Templates-3

Zabbix新增Web monitoring 監控Templates-3


第一新建Templates,設定macros、Web scenarios、Graphs。第二篇
設定Items、Graphs、Dashboards。將再設定Triggers、Action,當主機使用Template時可以進行告警通知。

設定Triggers

在Templates-Web montioring點選Triggers,右上方Create trigger新增。
01-create trigger

設定trigger 1

Name:Website is SLOW ({ITEM.LASTVALUE}):{$WEB.URL}
觸發條件為當網站10分鐘平均回應速度大於5秒。
02-trigger web slow url
Severity設為Warning
Expression內容點取Add
依Condition項目
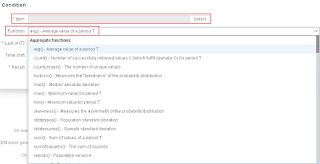
設定Function,下拉選取相關functions
03-trigger condition function select
設定Item點選select,進行選取相關item。
04-trigger condition item select
Condition項目
05-trigger condition item
或直接輸入avg(/Web monitoring/web.test.time[Web Health Check: {$WEB.URL},Website Availability,resp],10m)>5
按Add新增。

設定trigger 2

設定Name:Website not available: {$WEB.URL}
觸發條件為檢查網站無回應。
07-trigger web available url
Severity設為Warning
Expression項目Condition
08-trigger web available condition
或直接輸入last(/Web monitoring/web.test.fail[Web Health Check: {$WEB.URL}])<>0
因為使用Web scenarios的檢查網站如果成功回應,傳回值為0,所以設定當傳回值不為0,判斷網站有問題。
按Add新增。

設定trigger 3

Name:net.tcp.service not available [http,{$RE.IP}]
觸發條件為當網站3分鐘未回應。
10-trigger tcp agent available
Severity設為Average
Expression項目Condition
11-trigger tcp agent available condition
或直接輸入max(/Web monitoring/net.tcp.service[http,{$RE.IP}],3m)=0
因為使用zabbix agent 檢查網站如果成功回應,傳回值為1,所以設定當傳回值為0,判斷網站有問題,使用max(3m)定義時間。
按Add新增。

設定trigger 4

Name:net.tcp.service not available [http,{$RE.IP},80]
觸發條件為當網站未回應。
12-trigger tcp simple available
Severity設為Average
Expression項目Condition
13-trigger tcp simple available condition
或直接輸入max(/Web monitoring/net.tcp.service[http,{$RE.IP}],3m)=0
因為使用simple chek 檢查網站如果成功回應,傳回值為1,所以設定當傳回值不為1,判斷網站有問題。
按Add新增。

新增trigger後,可以選擇項目enable。
14-trigger enable

設定Trigger Actions

在Configuration> Actions> Trigger actions,新增Web monitoring  problems。
16-create web action
Type of calculation:Custom expression  A and ( B or  C or D or E )
Conditions
A Template equals Web monitoring 
B Trigger severity is greater than or equals Average 
C Trigger name contains Website is SLOW ({ITEM.LASTVALUE}):{$WEB.URL}
D Tag name equals Application
E Trigger name contains Website not available: {$WEB.URL}   

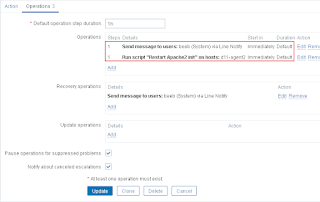
當符合A且BCDE一項符合時就使用Line notify通知使用者beeb,同時對主機下達apache2重啟指令。狀況恢復後時使用Line notify通知使用者beeb。
18-web action operations

測試結果
20-line ok
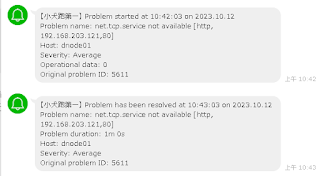
當10:42通知網站無法連線,10:43通知網站連線。


Template連結

新增Templates,設定macros、scenariosItems、Graphs、Dashboards、Triggers、Action等項目,學習了解Templates組成及應作模式。除了單獨新建Template外,也可以連結其它Template使用。
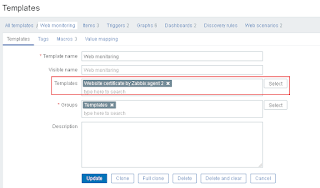
Web monitoring 連結Templates-Website certificate by Zabbix agent 2 
003-link template ok

2023年10月11日 星期三

Zabbix新增Web monitoring 監控Templates-2

Zabbix新增Web monitoring 監控Templates-2


上一篇已新建Templates,設定macros、Web scenarios、Graphs。將再設定Items、Graphs、Dashboards。

設定Items 

除了使用Web scenarios對網站進行監控外,也將設定items採用simple check或zabbix agent來確認主機的服務port,確認網站是否正常。
simple check和zabbix agent檢查使用的key值為net.tcp.service[service,ip,port]

net.tcp.service[service,ip,port]
檢查服務是否正在運行並接受 TCP 連線。
回應值0-服務已關閉
回應值1-服務正在運行

service-可以是:ssh、ldap、smtp、ftp、http、pop、nntp、imap、tcp、https、telnet等。
ip-IP 位址或 DNS 名稱(如果不指定,預設使用主機 IP/DNS)。
port-連接埠編號(預設使用標準服務連接埠號碼)。

更多的資料可以參考官網
Simple checks
Zabbix agent

在Templates-Web montioring點選Items,右上方Create item新增。
01-create items

設定Name:net.tcp.service[http.agent]
         Type:Zabbix agent
 Key:net.tcp.service[http,{$RE.IP}]

02-create item agent
Key值net.tcp.service[http,{$RE.IP}],只設定service、ip(使用marcos)。不設port號驗證。

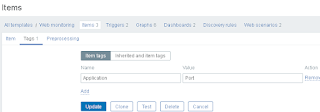
在Tags頁面,Add新增Item tags,按Add新增完成。
Name:Application
Value:Port
03-create item agent tags

設定Name:net.tcp.service[http.simple]
         Type:Simple check
  Key:net.tcp.service[http,{$RE.IP},80]

04-create item simple
Key值net.tcp.service[http,{$RE.IP}],設定service、ip(使用marcos)、80 port驗證。

在Tags頁面,Add新增Item tags,按Add新增完成。
Name:Application
Value:Port
05-create item simple tags

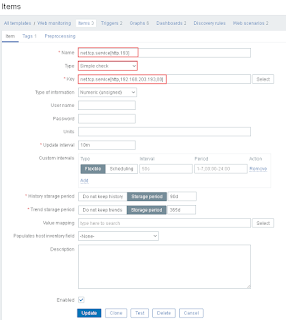
設定Name:net.tcp.service[http.193]
Key:net.tcp.service[http,192.168.203.193,80]
        Type:Simple check

06-create item simple 193
Key值net.tcp.service[http,{$RE.IP}],設定service、ip(直接指定)、80 port驗證。

在Tags頁面,Add新增Item tags,按Add新增完成。
Name:Application
Value:Port

在Templates的Macros,新增{$RE.IP},Value不用設定。
08-host add marcos

設定完成,請記得要到Web monitoring點選update。
07-items

設定Host dashboards

Host dashboards可以設定多個widget,將設定為圖表,指定為特定的Graph, 同時呈現並了解多個項目的數據。

在Templates-Web montioring點選Dashboards,右上方Create Dashboard新增。
15-create dashboard

在Dashboard properties頁面設定
Name:Web performance
Default page display period:1 minute
16-create dashboard01

進入Dashboard頁面,新增widget
Type:Graph(classic)
17-add widget
Graph點選Select,可以看到Templates設定的Graph,選擇想要的Graph。
18-add widget01

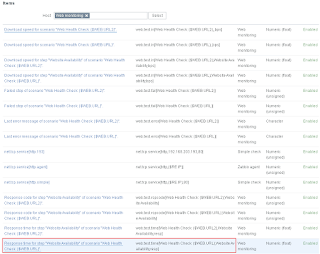
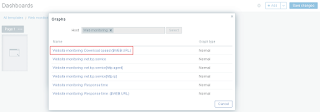
點選右上方+Add,分別新增3個widget呈現Website monitoring: Download speed:($WEB.URL}、Website monitoring: Response time、Website monitoring: Response time :($WEB.URL}圖表。
widget位置大小可以自行調整。
19-add widget03
設定完成後,請點選右上方Save changes。
20-dashboard01
請記得要到Web monitoring點選update,上面各項目的數字都正確,才算設定完成。
更多的資料參考官網Host dashboards
https://www.zabbix.com/documentation/6.0/en/manual/config/visualization/host_screens

template使用

主機使用template
22-host add templates

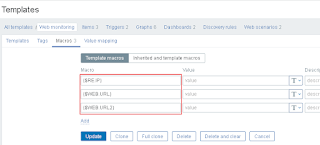
主機設定macros。設定{$WEB.URL}、{$WEB.URL2}、{$RE.IP}對應的網址url。
23-host add macros

Graph呈現
24-host graphs

Host Dashboard呈現
25-hosts dasboard